Layered Flowers Blog Hop
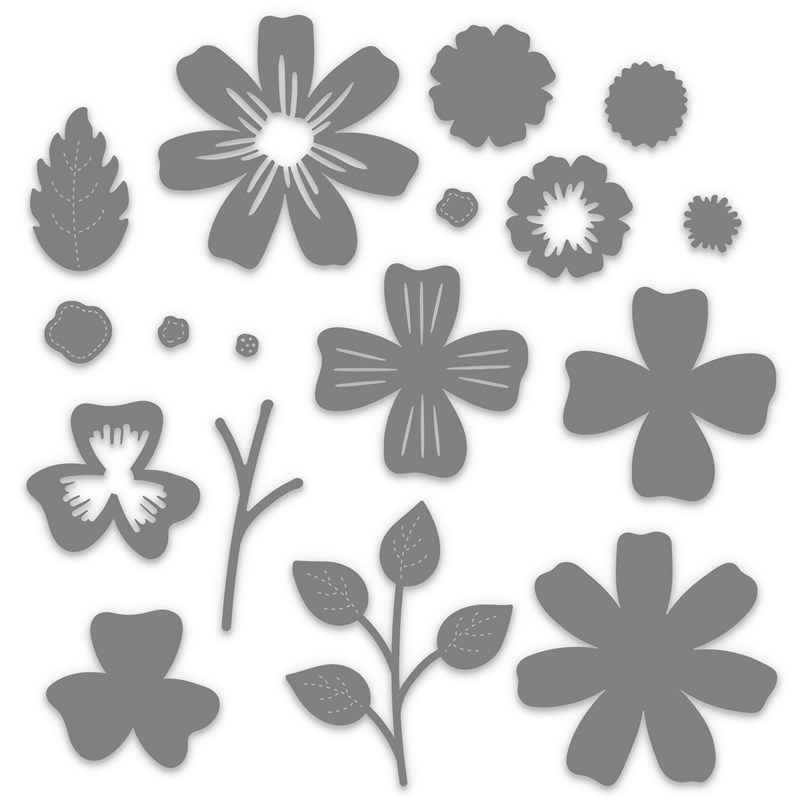
Close To My Heart's Layered Flowers set includes 17 thin metal dies that mix and match to create flowers in six different sizes and leaves in two sizes. They work perfectly with plain cardstock, printed papers, and specialty papers. This scrapbook layout features leaves cut from holographic papers.
![]()
If you arrived from Maz’s Blog, Amazing Creations, you are in the right place. If this is your first time on a blog hop, simply read on and enjoy my creations. Click on the link at the end of this post and it will take you to the next blog and so on and so on. Easy and fun! Best part is you can see several different projects to create with Close To My Heart’s Layered Flowers Thin Cuts. When you land back here, you are done and it’s time to hit the scrapbook room for some crafting fun.
Begin with a border for your layout
An economical way to create page borders is to cut strips and stick them to the edges of your base pages rather than using full sheets layered behind your base pages. That’s what I did here. The Desert Rose strips are 5/16” wide and were glued first. The Black Solid Core strips, cut at 1/8” were glued on top of the Desert Rose.
The trick to mitring the corners is to cut the mitre AFTER you have glued the borders down. You can follow the points on the cardstock and don’t have to measure anything!
By using Black core, no white showed on the cut edge of these strips. I just prefer that look.
Use Die Cut Inlay to create a repeated pattern
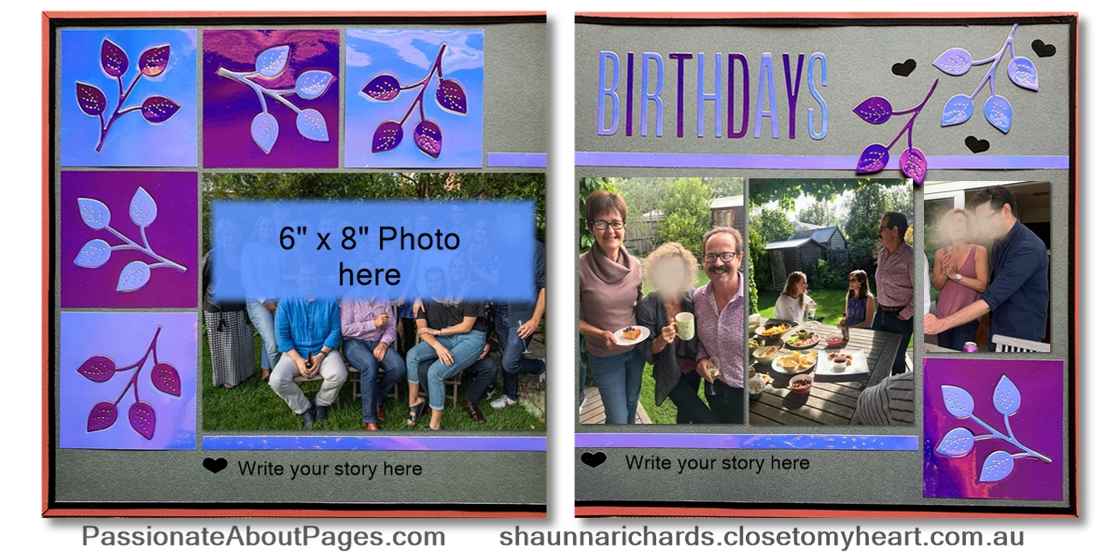
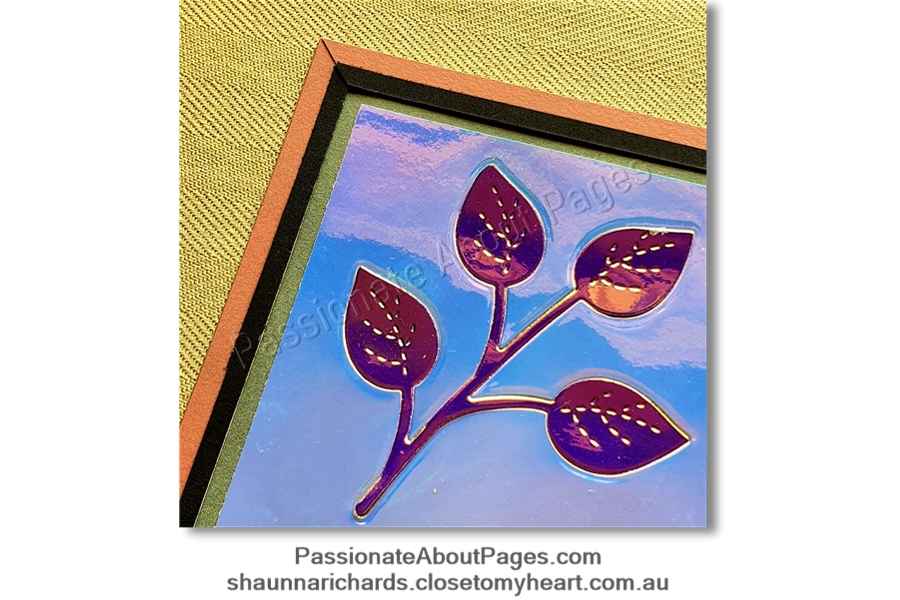
This layout features just one of the thin cuts from the Layered Flowers set – the leaves on a branch. I cut 3 ¼” squares in two shades of Holographic Paper – Oasis and Majestic.
Cut the leaf from each square and pair opposite colours when you are sticking them down. Putting the cut shape back in the negative space of the original piece is called an inlay. It keeps both pieces at the same level. Rotate each square 90° to vary the look of squares that are side by side.
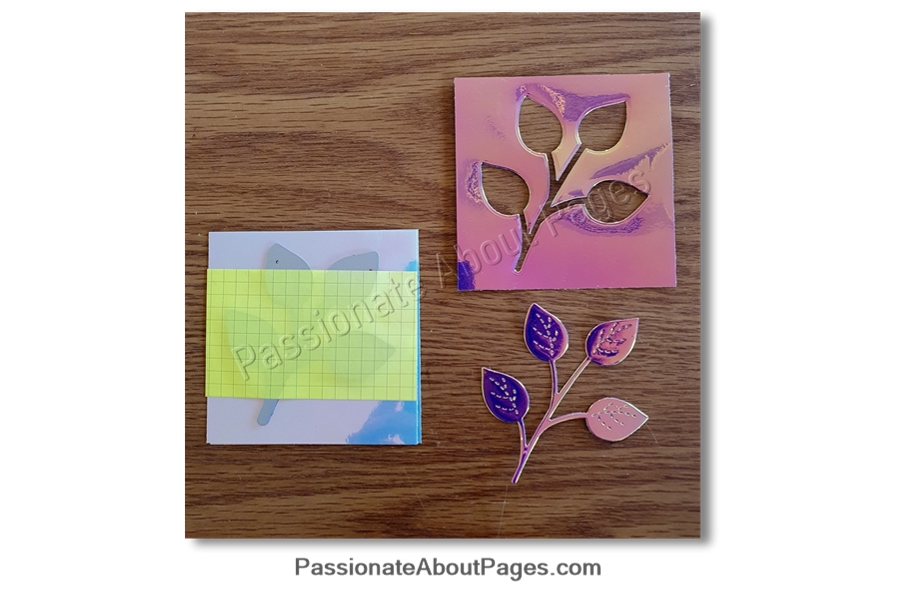
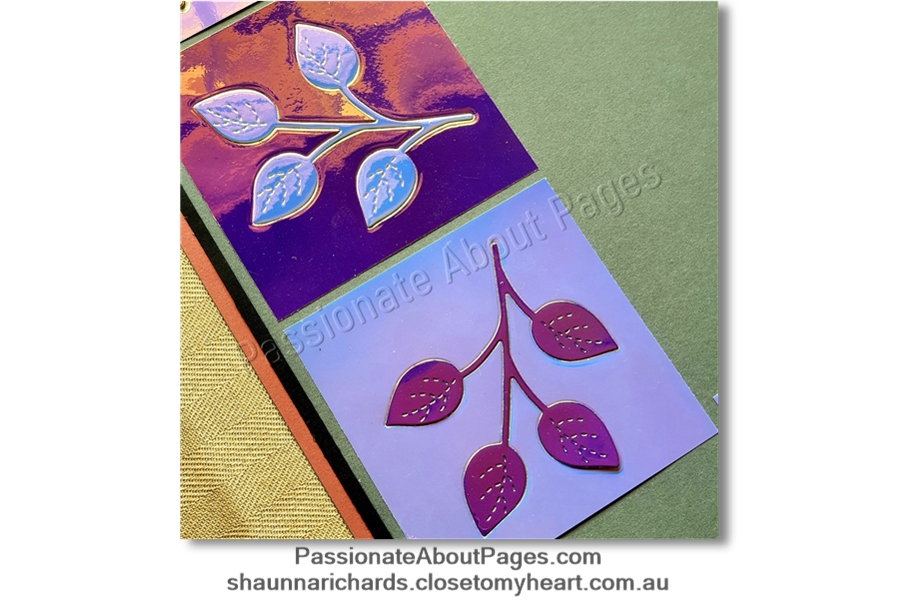
Just as a side note, both these papers look completely different colours in the catalogue. Holographic papers react to light conditions, colours near them and the angle you are viewing them at. It’s what I love best about working with them!
Keep it simple
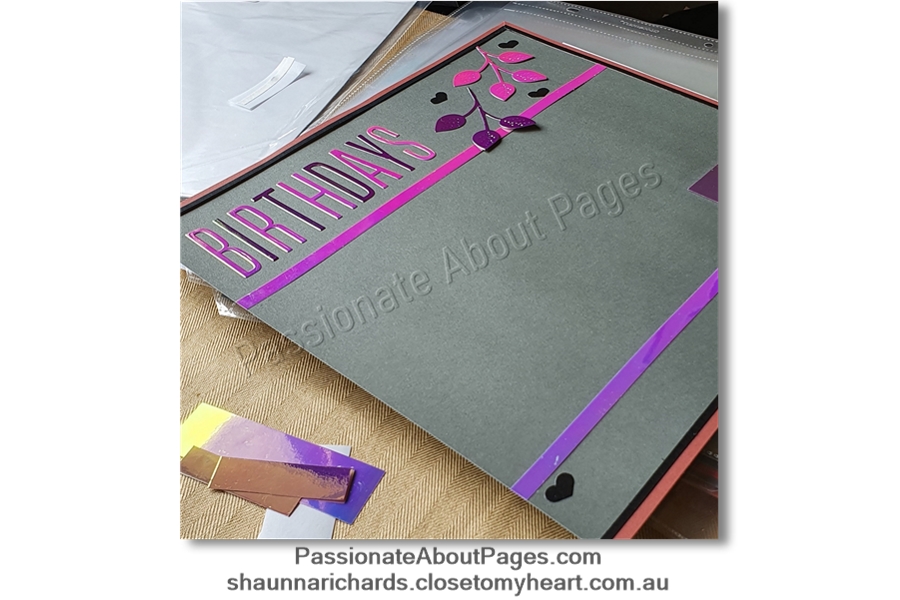
To maintain the inlay as a focal point I recommend you keep the rest of the layout simple.
- 3/8” horizontal strips of Holographic paper frame the photo cluster
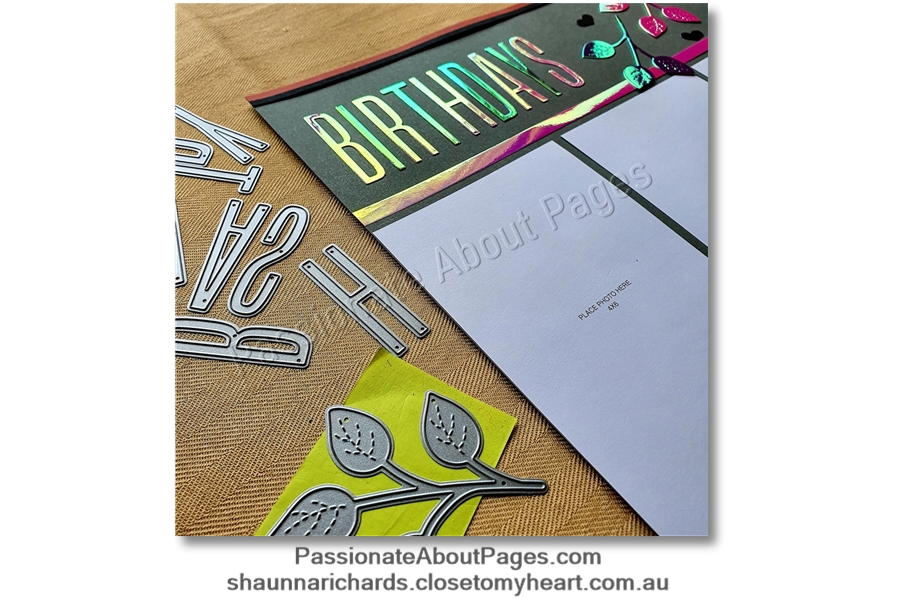
- The title is cut in alternating shades of Holographic paper using the Slim Alphabet Thin Cuts
- A couple of leafy branches in the top right corner help balance the layout
- The black hearts were cut using the Hearts Slimline Thin Cut.
- Add your story with black pen
How to use Adhesive sheets
This video shows you how to use Adhesive Sheets to help stick fiddly thin cuts. In this case, it’s the letters.
Order your supplies
The Layered Flowers Thin Cuts and all the other products used in this layout are featured in Close To My Heart’s annual catalogue and are available until August 2022.
Check your consultant’s website. If you’re an Aussie without a consultant, come shop with me by clicking here.
Next up is Alison’s blog, Scissors, Paper, Heart. I’m sure you will enjoy her creativity.
Happy Scrapping,
Shaunna
Products used in this project
Z4324 Layered Flowers Thin Cuts
Z4334 Slim Alphabet Thin Cuts
Z3992 Hearts Slimline Thin Cut
Z5022 Adhesive Sheets
Z3675 Majestic Holographic Paper
Z3636 Oasis Holographic Paper
X6058 Rosemary Cardstock
X6064 Black Core Cardstock
X6055 Desert Rose Cardstock
Z3372 Adhesive Runner
Z3396 Aluminium Cut Rail Trimmer
Z1836 Non-stick Micro-tip Scissors
Unless otherwise stated within the post, this is my original work. Please feel free to use as inspiration for your own personal use, but do not use for publication, contest/message board entries, or to sell. If my work inspires a work of your own, please give credit by posting a link to my blog. Thank you!
About Shaunna
Shaunna Richards is the founder of Passionate About Pages, a business built on finding connections to help women keen to preserve their memories though photos, memorabilia and storytelling in traditional scrapbook albums.
Shaunna’s 20+ years in the scrapbooking industry coupled with her teaching background make her the perfect person to show you how it’s done.
Categories
- Cards (64)
- Stamping (109)
- Thin Cuts (49)
- Photo Organisation (1)
- Album Planning (1)
- Scrapbook Layouts (244)
- Stamp of the Month (91)
- Paper Craft (11)
- Paper Fundamentals (17)
- Simple pages (2)
- Washi Tape (8)
- Flip Flaps (11)
- Tools (16)
- PML (4)
- Organisers (3)
- stickers (6)
- Albums (7)
- Workshops (3)
- watercolour pencils (2)
- Watercolour paints (2)
- Workshops Your Way (34)
- Special Offers (39)
- Organise Your Photos (3)
- Craft with Heart (3)
- Storytelling (6)
- VIP (3)
- Shimmer Brush (1)
- Glitter Paper (1)
- Paper Candy (2)
- Interactive Cards (1)
- Metallic Markers (1)
- Tell Your Story (2)
- Distress Oxides (2)
- Nearly Bare Pages (1)
- Wedding (2)
- Stencils (1)
- Free download (2)
- Organisation (1)
- Same but Different (1)
9 comments
I love love love this layout and the inlaid square idea!
Your video of how to use the adhesive sheets was very helpful - thank you
That makes me so happy Alison. I want to try it with some of the flowers on smaller squares for a card too. I think the adhesive sheets are such a winner!
Love how you done the leaves using the Holographic paper. They look really good on this layout
Thanks Maz, Like you, that leaf cluster is my fav in the set!
Great use of both the thin cut and the surrounding papers, the thin borders looks great and a terrific tip about cutting the mitre after the papers are adhered down.
Thanks Dorsi. Yes! I struggled for years getting mitres to match up and then came up with this method - so much easier.
Love the use of the holographic paper. I need to try that now!
I love playing with this paper, Doreen. You will have so much fun.
Love the border. Beautiful in the holographic paper.
Leave a comment