Engagement Party Photo Prop Frame
Love is in the air
Mike and I had the great joy of hosting an engagement party for our daughter and her fiancé recently. Many of their close friends, family members and some of Kathryn’s scrapbook aunties joined us. I had a lot of fun creating this frame for photo opportunities.
It's not difficult to make a decorative frame but it does take some time. Start early so you can enjoy the process and play around with placement of elements before you commit to gluing them down. The proposal happened at the beach so seashell stamps were an obvious choice and a couple of nice big Cricut cut diamonds were essential. Twine and some leftover packaging added texture.
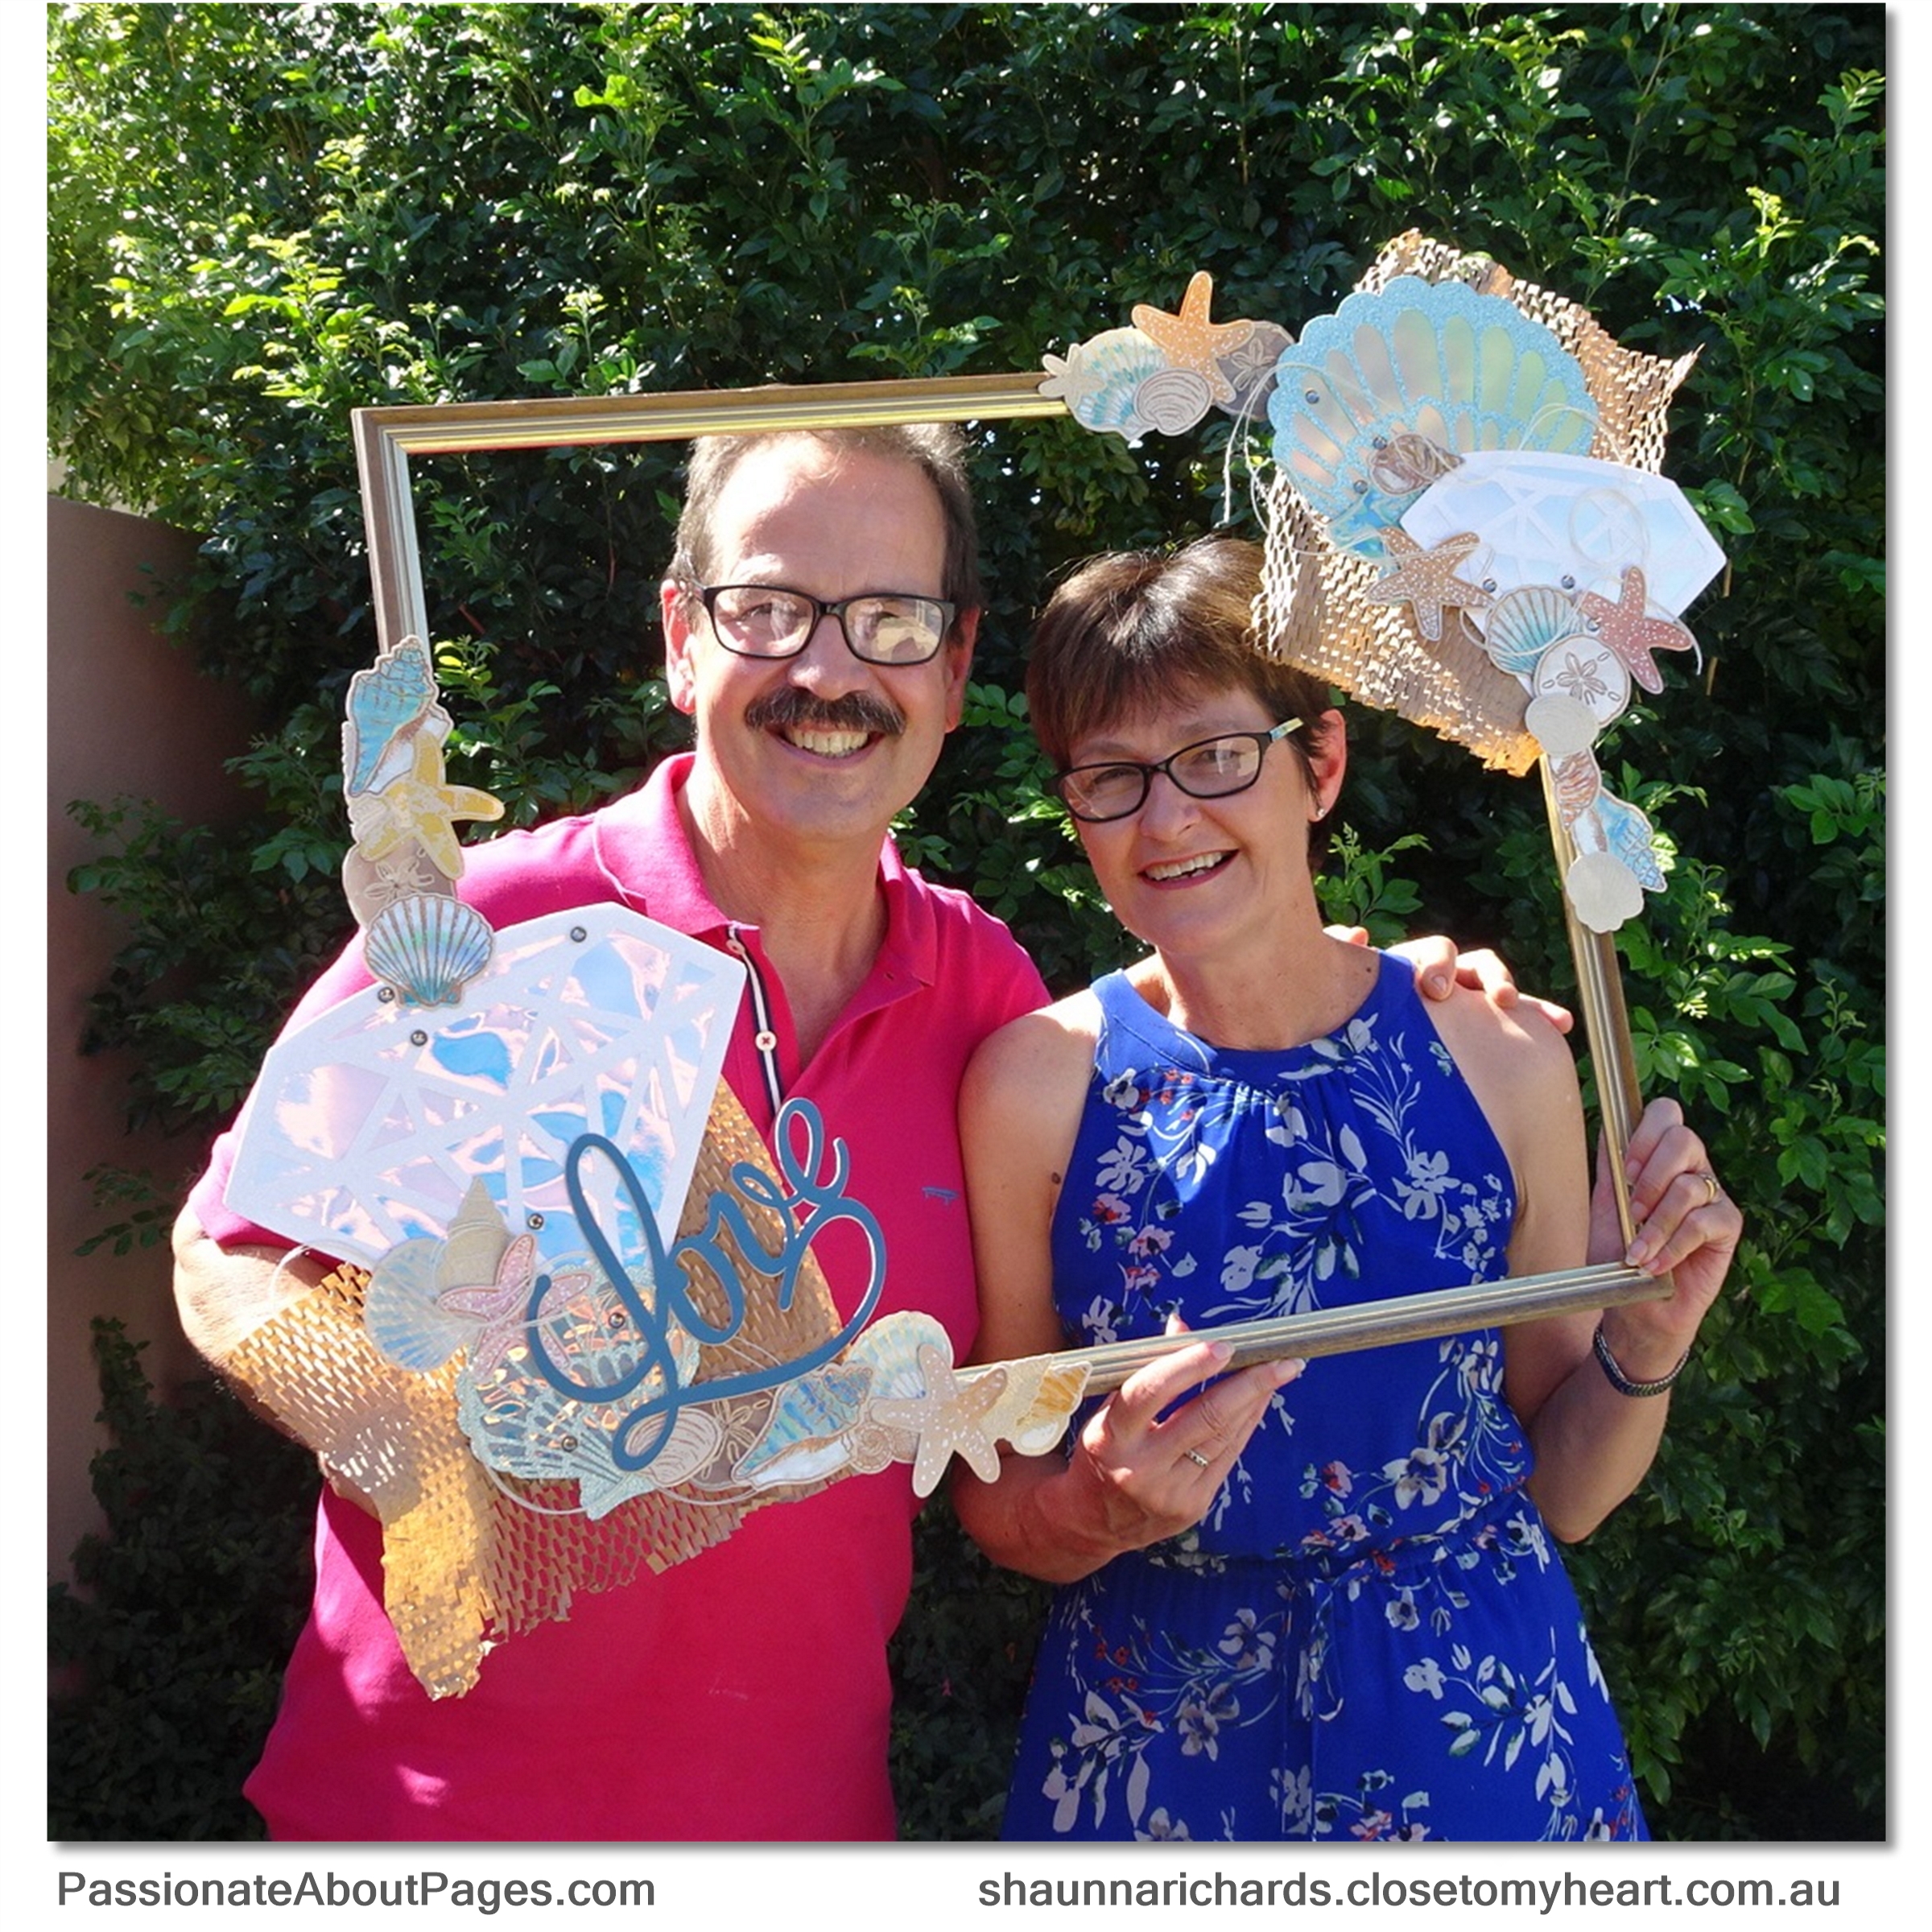
Find a sturdy frame
This one came from an Op Shop. It had a very dated picture in it and was only a few dollars. It was easy to pop the picture out and use pliers to bend the metal thingies that held it in so no fingers would be harmed during the photographs.
Begin making LOTS of small elements
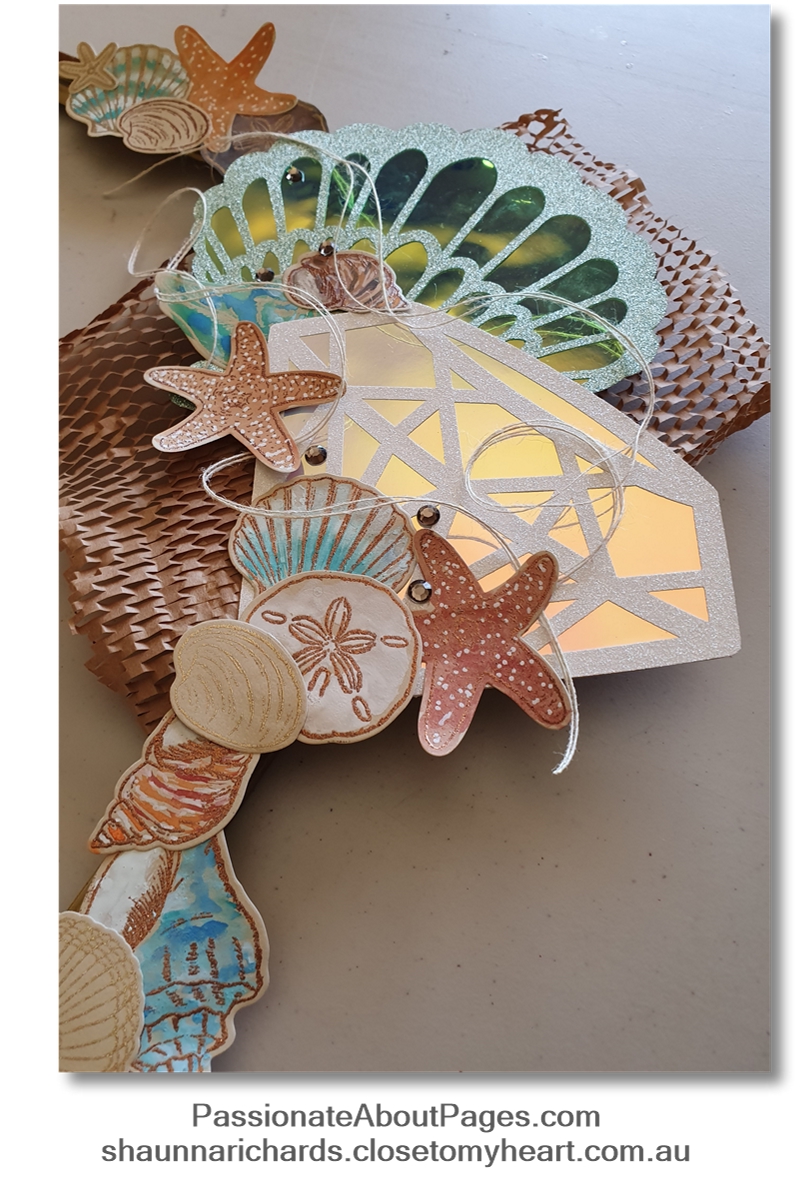
You will be amazed how many small pieces you will use to achieve a balanced look to your frame. The seashells on this one come from two stamp sets. The smaller shells are from a retired set called Swirly Shells and the largest shells are a stamp and thin cut set called Beach Treasures, available for 30% off as part of this month’s Stamptacular sale. Stamp the shells onto the light side of almond cardstock and heat emboss using Copper Tinsel, Gold Tinsel or Clear powder.
Then pull up some images of real shells on your phone or laptop and use them as a guide to add colour and patterns to the largest shells using watercolour paints. I was fortunate to have an artist visiting who took over this part for me 😊
Create focal elements
The large and medium size diamonds were cut from white glitter paper using Close To My Heart’s Artistry Cricut Cartridge. The largest seashells were a free download from Cricut and were cut in julep glitter paper. Cut two layers for the base of each Cricut shape to strengthen them. In this frame, the gorgeous Holographic paper shows through the pattern of the shell overlays and a solid cardstock forms the bottom layer. See how the play of light changes the colour of the holographic papers?
‘Love’ was cut 4 times from cardstock and layered to make it really robust. It isn’t attached to anything firm so needs to be able to stand up to some handling.
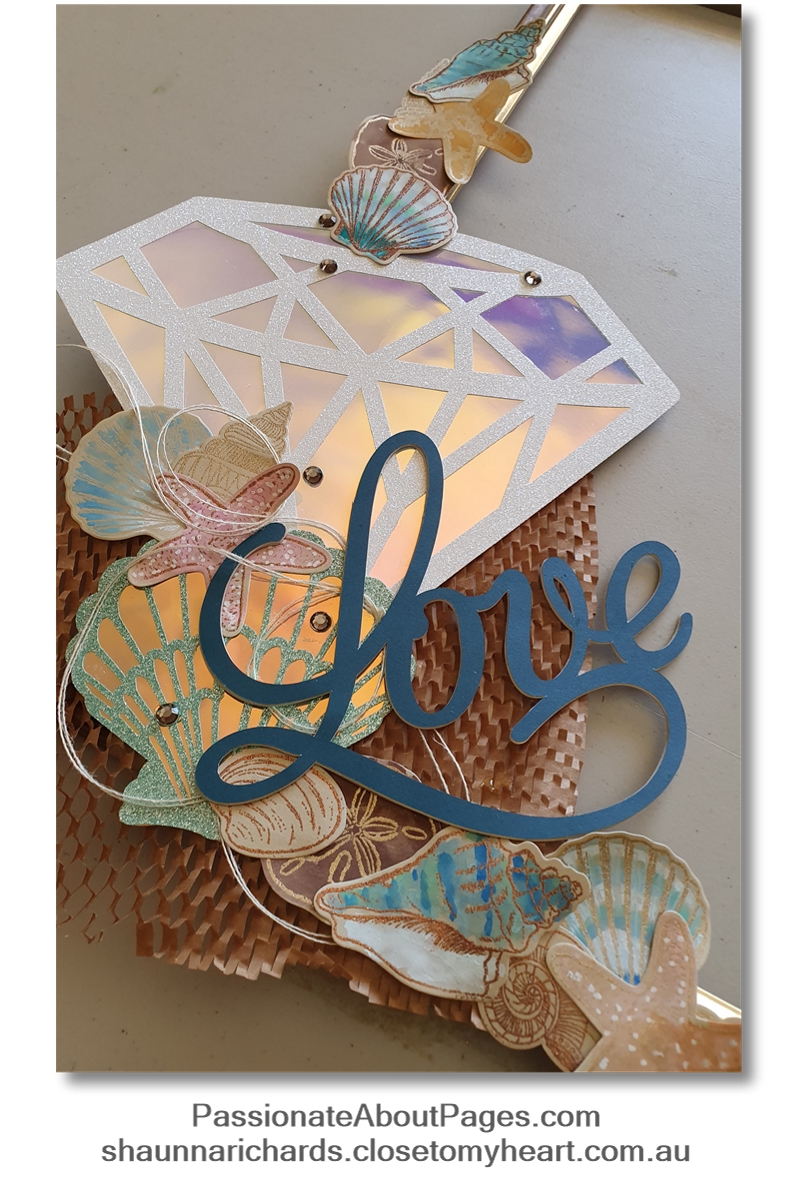
Layer all your elements
This part does take some time. You will find you move pieces around quite a bit until your design is balanced and pleasing to your eye. Work in opposite corners with the lower cluster taking more space than the top one.
You need an anchor to build your design on. I had some brown paper packaging that came wrapped around bottles. I’ve had it in the craft cupboard for 2 years not knowing how I would use it. This was the perfect project for it! Attach your largest elements to this base. I used liquid glass because it gives a strong bond and filled the gaps in the brown paper.
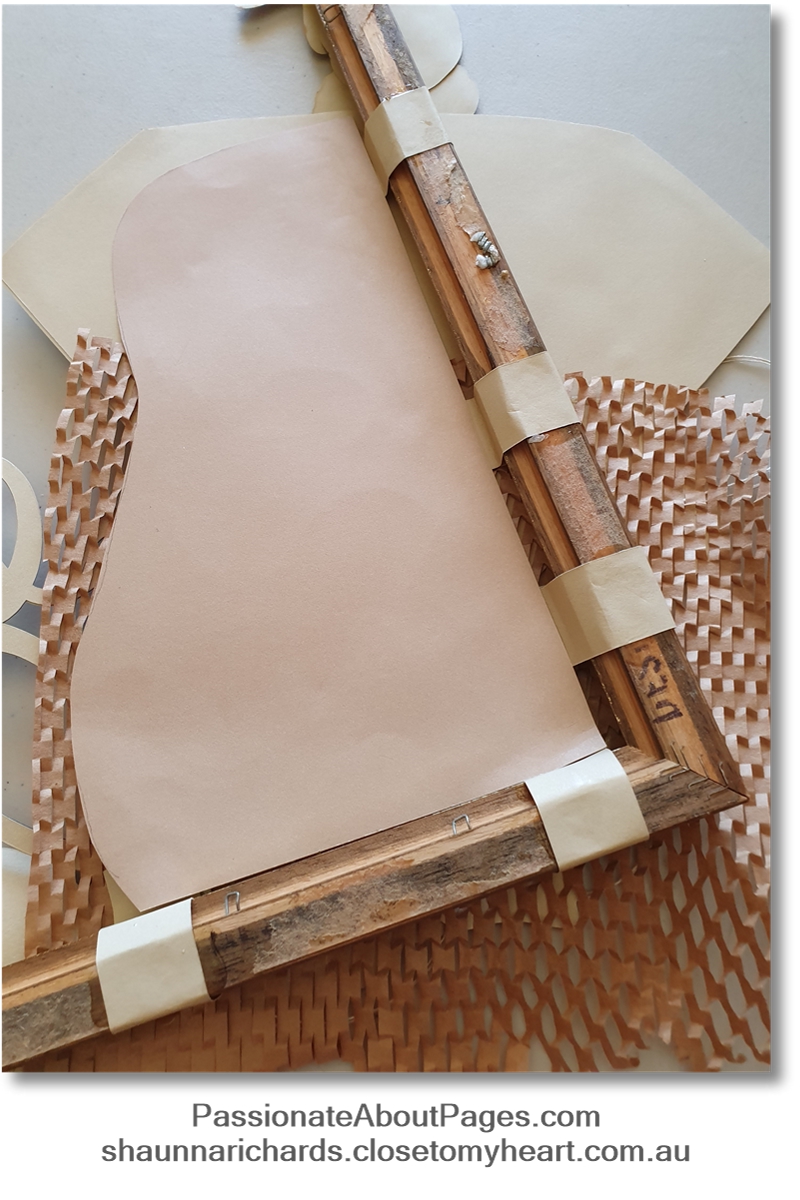
The trickiest part was attaching this base cluster to the frame. My final solution was to cut 1” strips of cardstock. Liquid glass one end to the back of the brown paper, coat the strip with more liquid glass and wrap it around the frame. You are working from the back so it doesn’t have to be neat. Once all the decorative elements are in place you can come back and cover the ‘workings’ with a sheet of cardstock cut to fit.
The final stages are attaching the smaller elements and adding some texture to the clusters. A mixture of glue dots and liquid glass holds everything in place. Shells are overlapped and tucked behind other elements. The twine is caught in a couple of places so it can loop and provide dimensionality. Some chunky bling added contrasting colour.

Choose your theme and start creating
What theme could you use for a photo prop frame? Have a look through your supplies and re-discover hidden treasures in your craft cupboard.
A list of supplies used in this project appears below. Order yours on my website. All Stamp Sets and Stamp/Thin Cut bundles are discounted by up to 50% during February 2020. Look for the Stampaganza link.
Happy scrapping,
Shaunna
Close To My Heart products used in this project
Z3611 Cricut Artistry Digital Collection
Z3367 White Glitter Paper
Z3506 Julep Glitter Paper
Z3635 Dreamy Holographic Paper
Z3636 Oasis Holographic Paper
X6046 French Vanilla Cardstock
X6030 Peacock Cardstock
X5949 Almond Cardstock (Light side)
Z891 VersaMark Ink Pad
Z4250 Tinsel Embossing Powder
Z4248 Silver Embossing Powder
Z2088 Clear Embossing Powder
Z3132 Watercolour paints
Z3225 Medium Water brush
Z679 Liquid Glass
1772 3/8” Ultra Thin Glue Dots
Categories
- Cards (64)
- Stamping (109)
- Thin Cuts (49)
- Photo Organisation (1)
- Album Planning (1)
- Scrapbook Layouts (244)
- Stamp of the Month (91)
- Paper Craft (11)
- Paper Fundamentals (17)
- Simple pages (2)
- Washi Tape (8)
- Flip Flaps (11)
- Tools (16)
- PML (4)
- Organisers (3)
- stickers (6)
- Albums (7)
- Workshops (3)
- watercolour pencils (2)
- Watercolour paints (2)
- Workshops Your Way (34)
- Special Offers (39)
- Organise Your Photos (3)
- Craft with Heart (3)
- Storytelling (6)
- VIP (3)
- Shimmer Brush (1)
- Glitter Paper (1)
- Paper Candy (2)
- Interactive Cards (1)
- Metallic Markers (1)
- Tell Your Story (2)
- Distress Oxides (2)
- Nearly Bare Pages (1)
- Wedding (2)
- Stencils (1)
- Free download (2)
- Organisation (1)
- Same but Different (1)
2 comments
Leave a comment